출처: https://learnopengl.com/Guest-Articles/2021/Tessellation/Height-map
Tesselation: CPU Implementation
지형(without any caves or overhangs)
- height map이 적용된 mesh로 렌더링 가능
hegiht map
- 그레이 스케일 이미지
- 텍셀 값: vertex가 법선을 따라 이동해야하는 거리
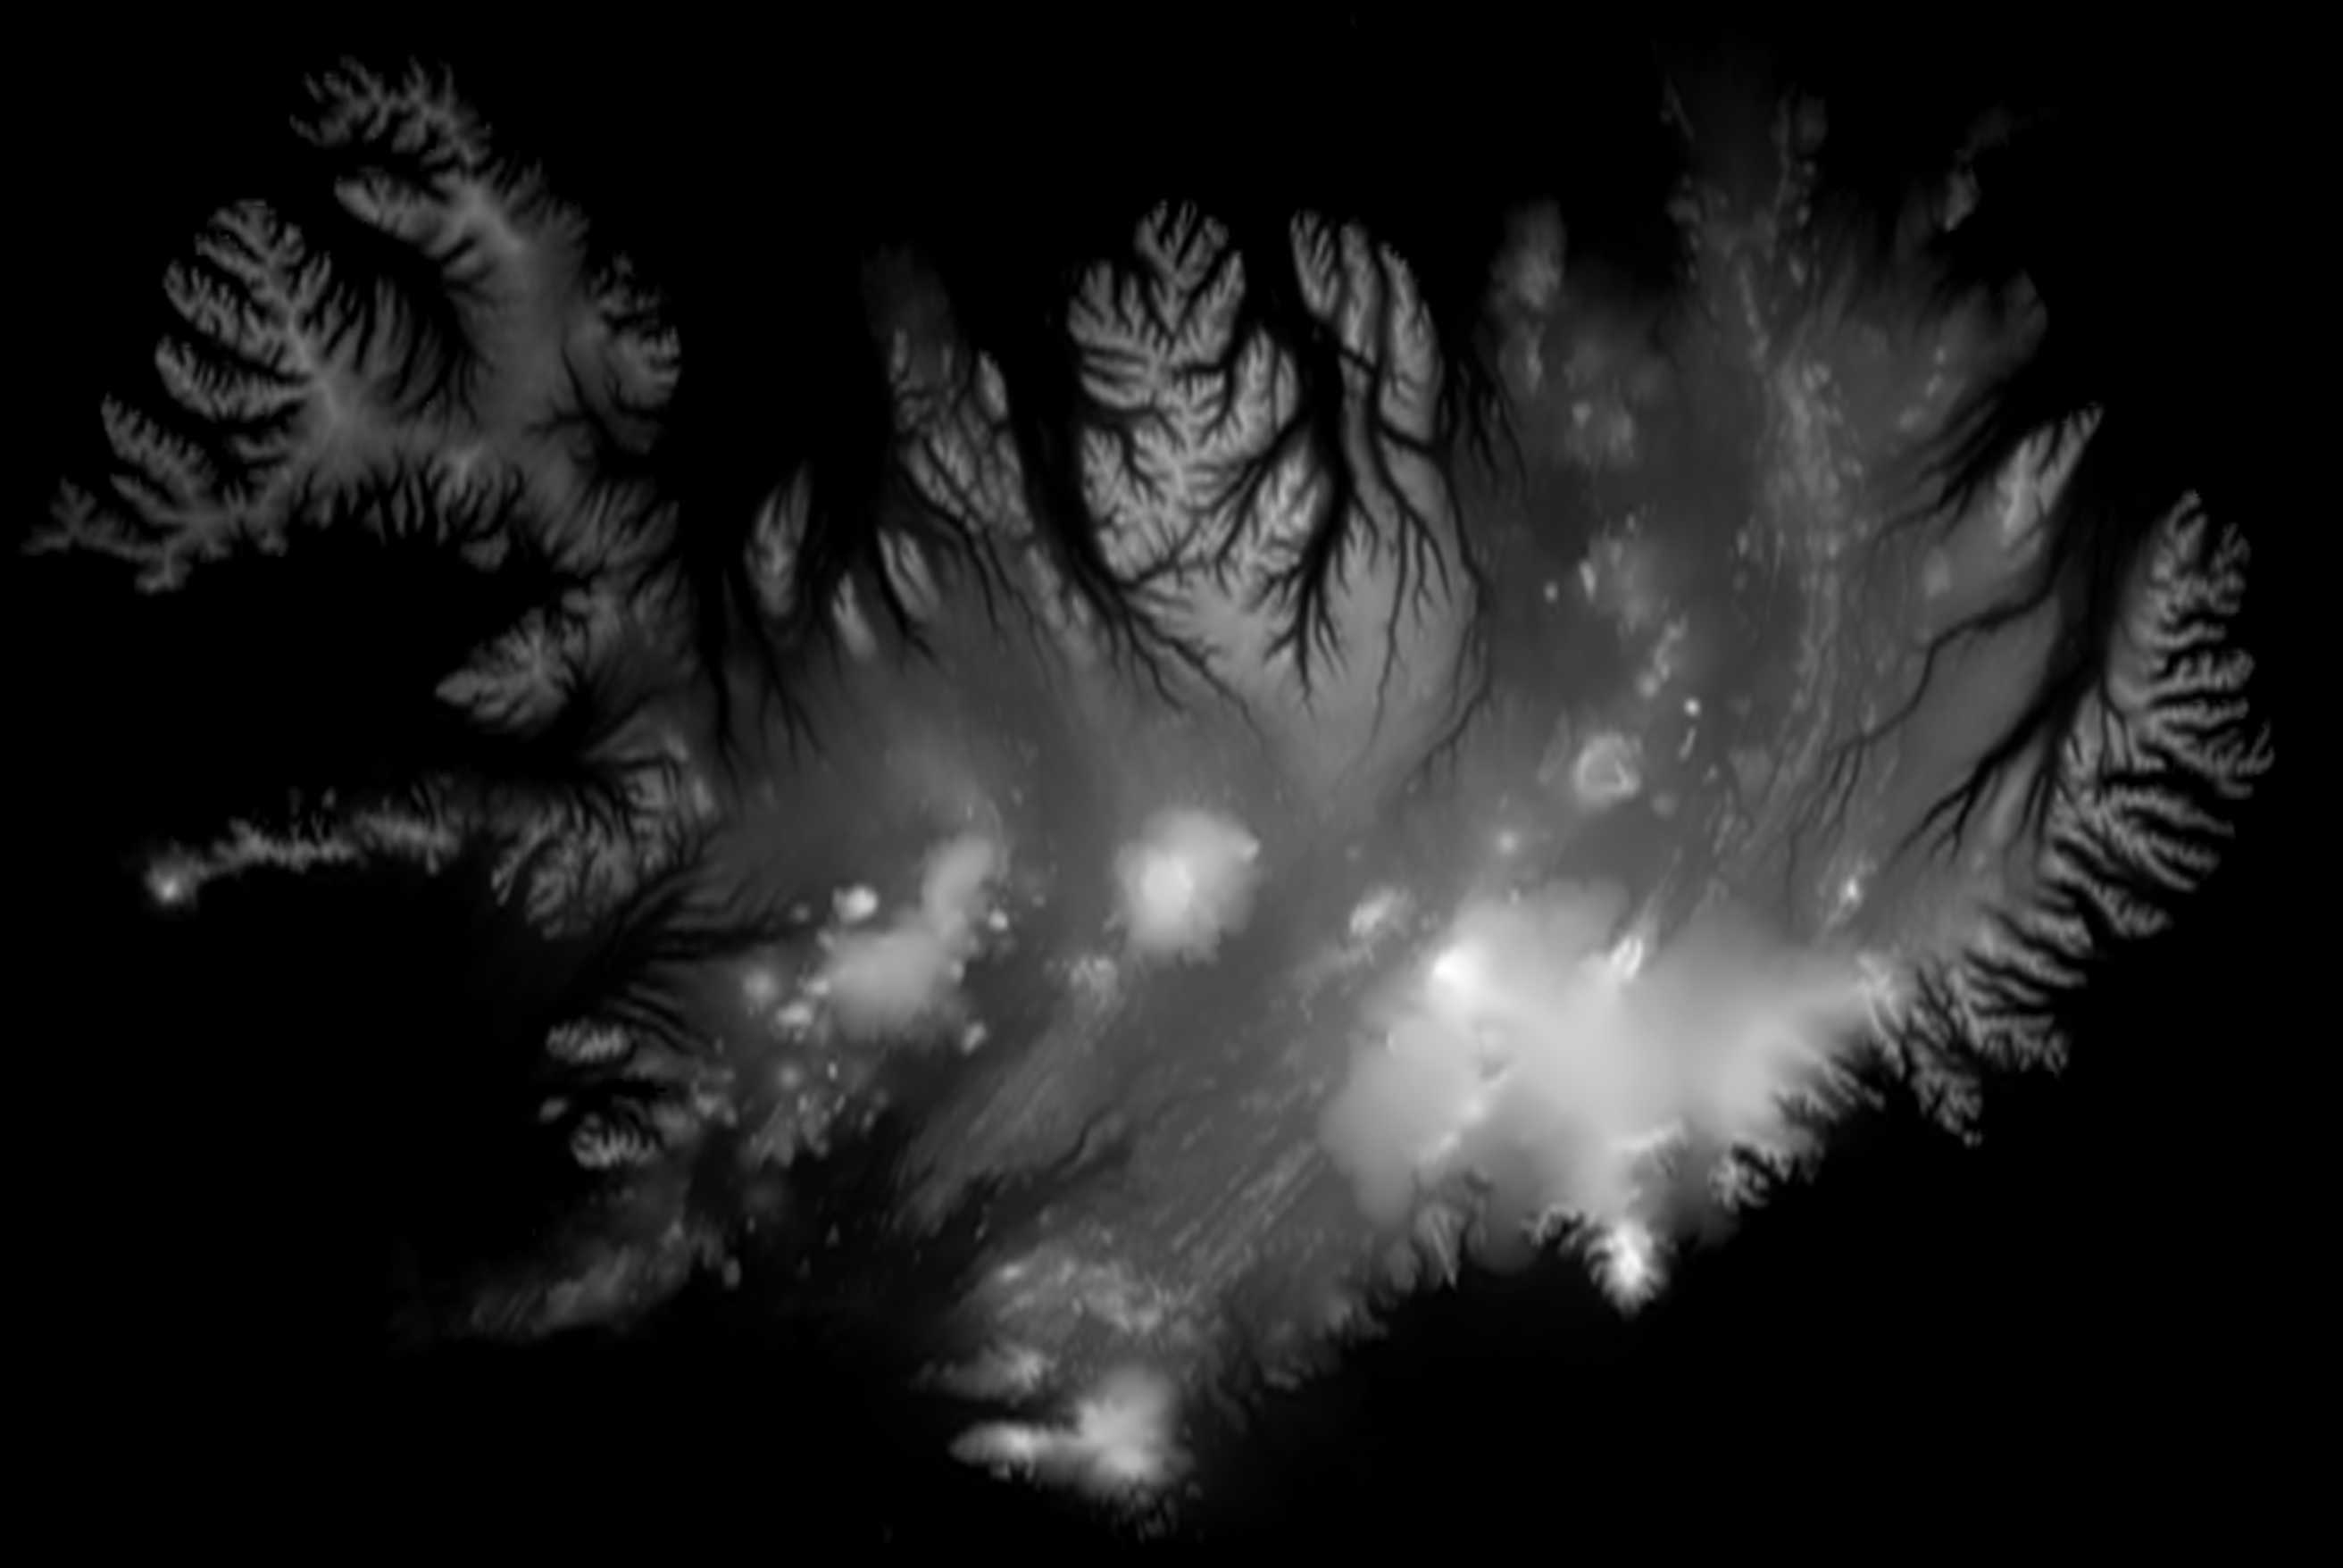
이번 챕터에서 사용하는 heightmap 은 위와 같다.
CPU 구현방식은 삼각형이나 육면체를 그리는 것과 비슷하게 VBO, EBO, VAO 데이터를 잘 정리하는 것이 전부이다.
VBO: 정점들의 개수를 heightmap 크기만큼 생성한후, 적당한 x, z 값을 할당한 후, 위 heightmap 의 색상값을 높이로 삼으면된다.
EBO: 메쉬를 그리기 위해 정점들이 형성하는 삼각형을 그리는 순서를 정해줘야한다. 여기서는
GL_TRIANGLE_STRIP방식으로 그리며, 띠 형태로 나누어서 여러번 드로우 콜하는 방식이다.
CPU 방식 단점
- 드로우콜이 많다.
- 메모리가 많이 필요하다.
heightmap 로드
1
2
3
4
5
// load height map texture
int width, height, nChannels;
unsigned char *data = stbi_load("resources/heightmaps/iceland_heightmap.png",
                                &width, &height, &nChannels,
                                0);
- 텍스처 로드와 마찬가지로 stbi 라이브러리로 heightmap 이미지를 로드하자
VBO 생성에 필요한 데이터
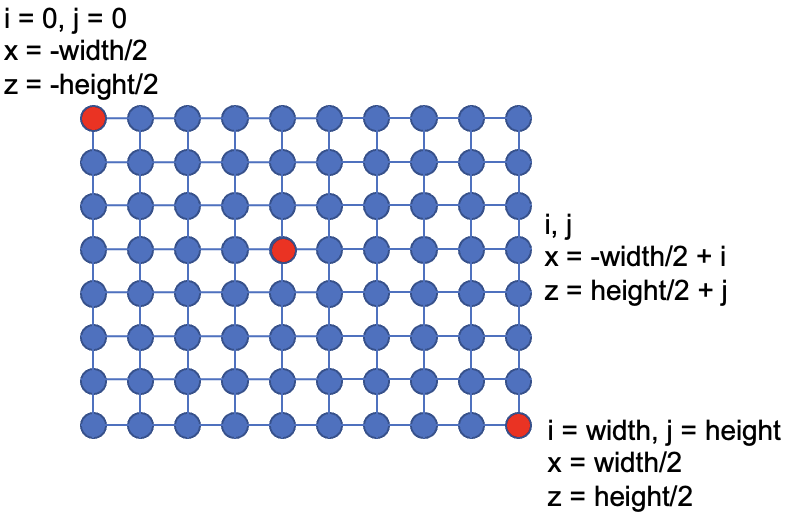
중심의 x, z 값을 (0,0)로 잡는다. 그러므로 다른 정점들의 x와 z 값은 위 그림과 같이 나타낼 수 있다.
정점의 y 값은 표면의 법선을 나타내며 heightmap의 데이터 값을 기반으로한다.
1
2
3
4
5
6
7
8
9
10
11
12
13
14
15
16
17
18
19
20
// vertex generation
std::vector<float> vertices;
float yScale = 64.0f / 256.0f, yShift = 16.0f;  // apply a scale+shift to the height data
for(unsigned int i = 0; i < height; i++)
{
    for(unsigned int j = 0; j < width; j++)
    {
        // retrieve texel for (i,j) tex coord
        unsigned char* texel = data + (j + width * i) * nChannels;
        // raw height at coordinate
        unsigned char y = texel[0];

        // vertex
        vertices.push_back( -height/2.0f + i );        // v.x
        vertices.push_back( (int)y * yScale - yShift); // v.y
        vertices.push_back( -width/2.0f + j/ );        // v.z
    }
}

stbi_image_free(data);
위 코드에서, y 값에 yScale을 곱해주고 yShift를 빼주는 것을 볼 수 있는데 이는 특정한 범위의 값을 가지도록 하기 위함이다. (원하면, 다른 값을 사용해도 됨)
- 초기 y 값의 범위 [0, 256]
yScale- normalize: [0.0f, 1.0f]
- 원하는 범위로: [0.0f, 64.0f]
yShift- 원하는 범위로 이동 [-16.0f, 48.0f]
또한, 로드한 heightmap 데이터는 이제 필요 없으므로 메모리 해제를 해줘야한다.
EBO 생성에 필요한 데이터
- 정점들이 형성하는 삼각형들을 연결해주기위해 EBO를 생성해야한다.
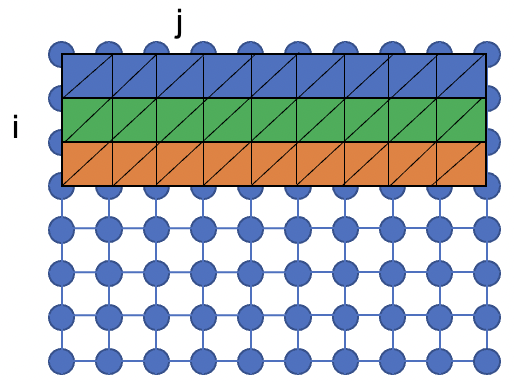
- 위 이미지에서 각각 색상이 다른 strip을 볼 수 있다.
- 이 튜토리얼에서는 이처럼 삼각형들로 구성된 strip을 여러번 드로우 콜하는 방식을 사용한다.
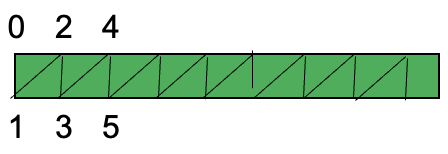
- 하나의 stripe 정점 순서는 위와 같다.

- 각 stripe의 정점 순서는 위와 같이 나타낼 수 있으며, 코드는 아래와 같다.
1
2
3
4
5
6
7
8
9
10
11
12
// index generation
std::vector<unsigned int> indices;
for(unsigned int i = 0; i < height-1; i++)       // for each row a.k.a. each strip
{
    for(unsigned int j = 0; j < width; j++)      // for each column
    {
        for(unsigned int k = 0; k < 2; k++)      // for each side of the strip
        {
            indices.push_back(j + width * (i + k));
        }
    }
}
VAO
- 앞에서 정리한 데이터들을 이제 OpenGL 객체로 즉, GPU로 올려야한다.
1
2
3
4
5
6
7
8
9
10
11
12
13
14
15
16
17
18
19
20
21
22
// register VAO
GLuint terrainVAO, terrainVBO, terrainEBO;
glGenVertexArrays(1, &terrainVAO);
glBindVertexArray(terrainVAO);

glGenBuffers(1, &terrainVBO);
glBindBuffer(GL_ARRAY_BUFFER, terrainVBO);
glBufferData(GL_ARRAY_BUFFER,
             vertices.size() * sizeof(float),       // size of vertices buffer
             &vertices[0],                          // pointer to first element
             GL_STATIC_DRAW);

// position attribute
glVertexAttribPointer(0, 3, GL_FLOAT, GL_FALSE, 0, (void*)0);
glEnableVertexAttribArray(0);

glGenBuffers(1, &terrainEBO);
glBindBuffer(GL_ELEMENT_ARRAY_BUFFER, terrainEBO);
glBufferData(GL_ELEMENT_ARRAY_BUFFER,
             indices.size() * sizeof(unsigned int), // size of indices buffer
             &indices[0],                           // pointer to first element
             GL_STATIC_DRAW);
Draw
- strip의 개수와 각 strip 당 정점의 개수는 다음과 같다.
1
2
const unsigned int NUM_STRIPS = height-1;
const unsigned int NUM_VERTS_PER_STRIP = width*2;
이러한 개수만큼
glDrawElements를 호출해주자.이 때 정점의 offset을 주의하자.
1
2
3
4
5
6
7
8
9
10
11
12
13
// draw mesh
glBindVertexArray(terrainVAO);
// render the mesh triangle strip by triangle strip - each row at a time
for(unsigned int strip = 0; strip < NUM_STRIPS; ++strip)
{
    glDrawElements(GL_TRIANGLE_STRIP,   // primitive type
                   NUM_VERTS_PER_STRIP, // number of indices to render
                   GL_UNSIGNED_INT,     // index data type
                   (void*)(sizeof(unsigned int)
                             * NUM_VERTS_PER_STRIP
                             * strip)); // offset to starting index
}
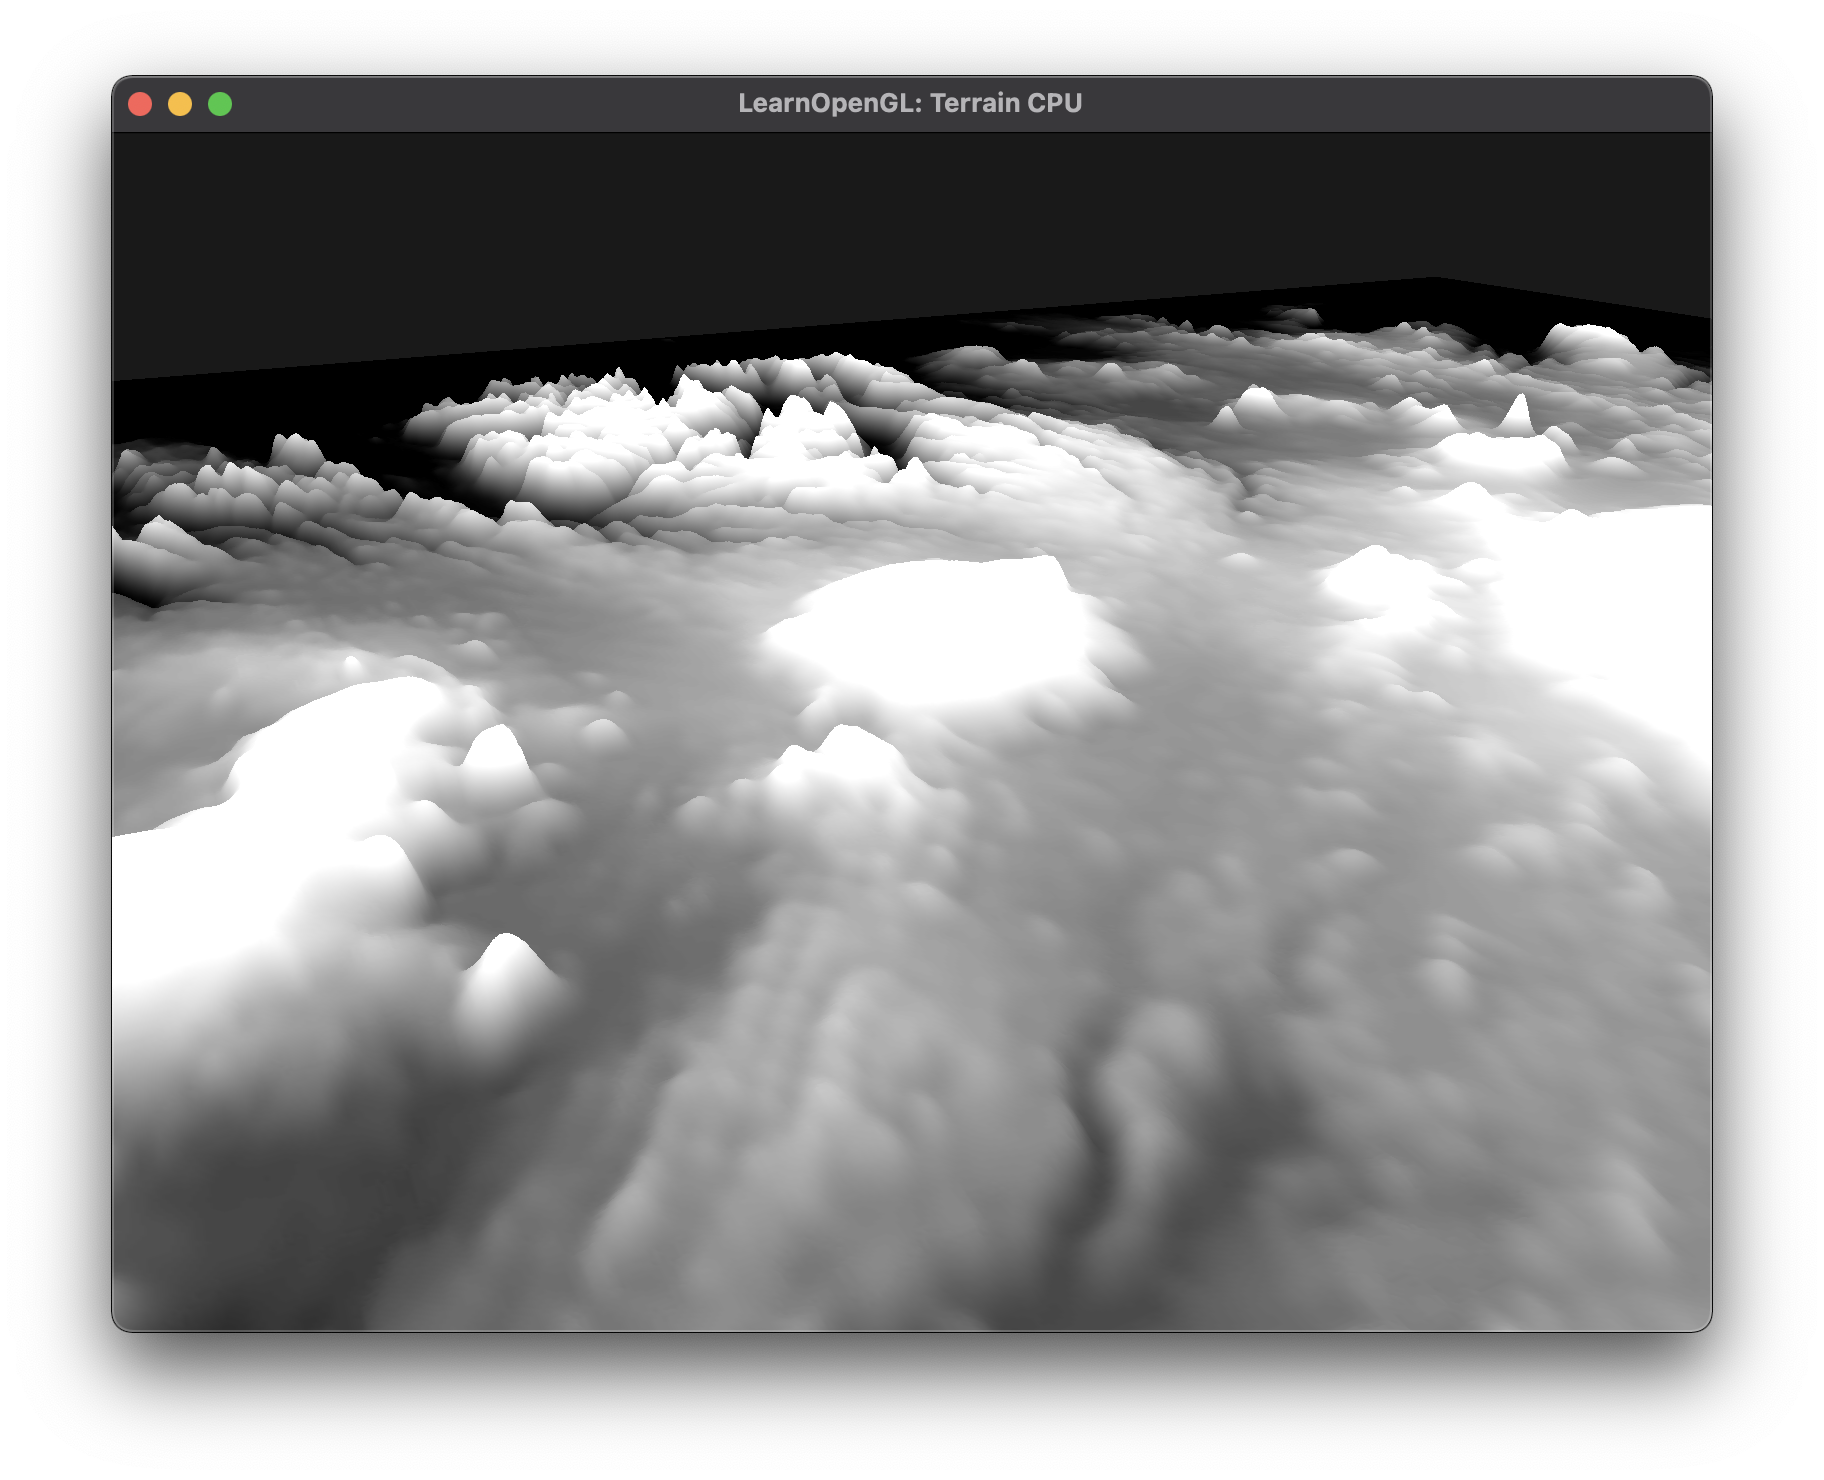
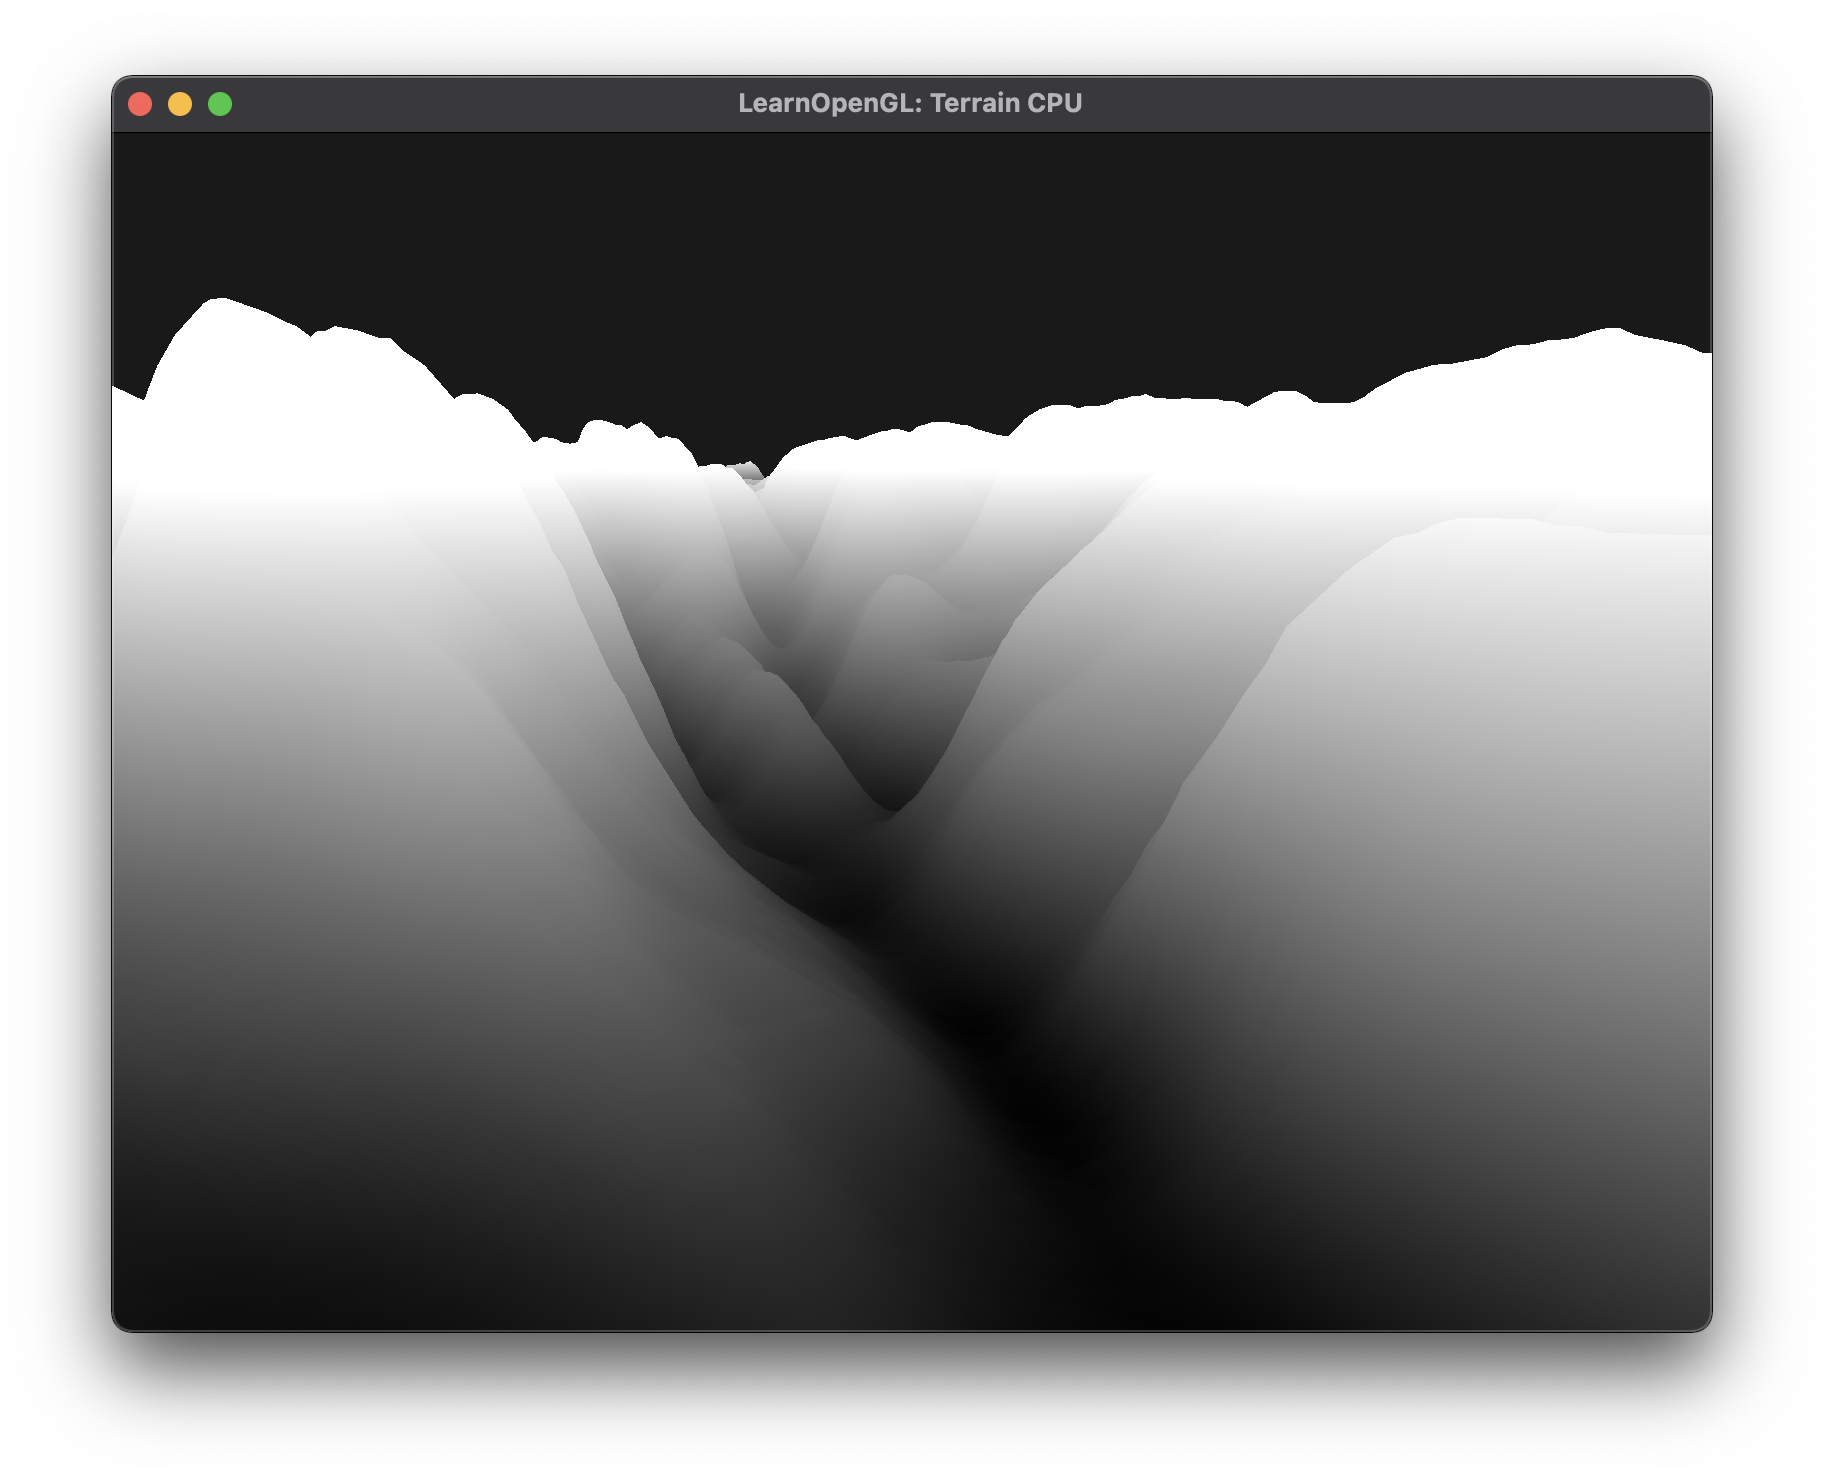
- 아래는 frag 셰이더에서 높이값을 색상값으로 삼은 것 (적절히 [0, 255] 범위로 설정해야함)
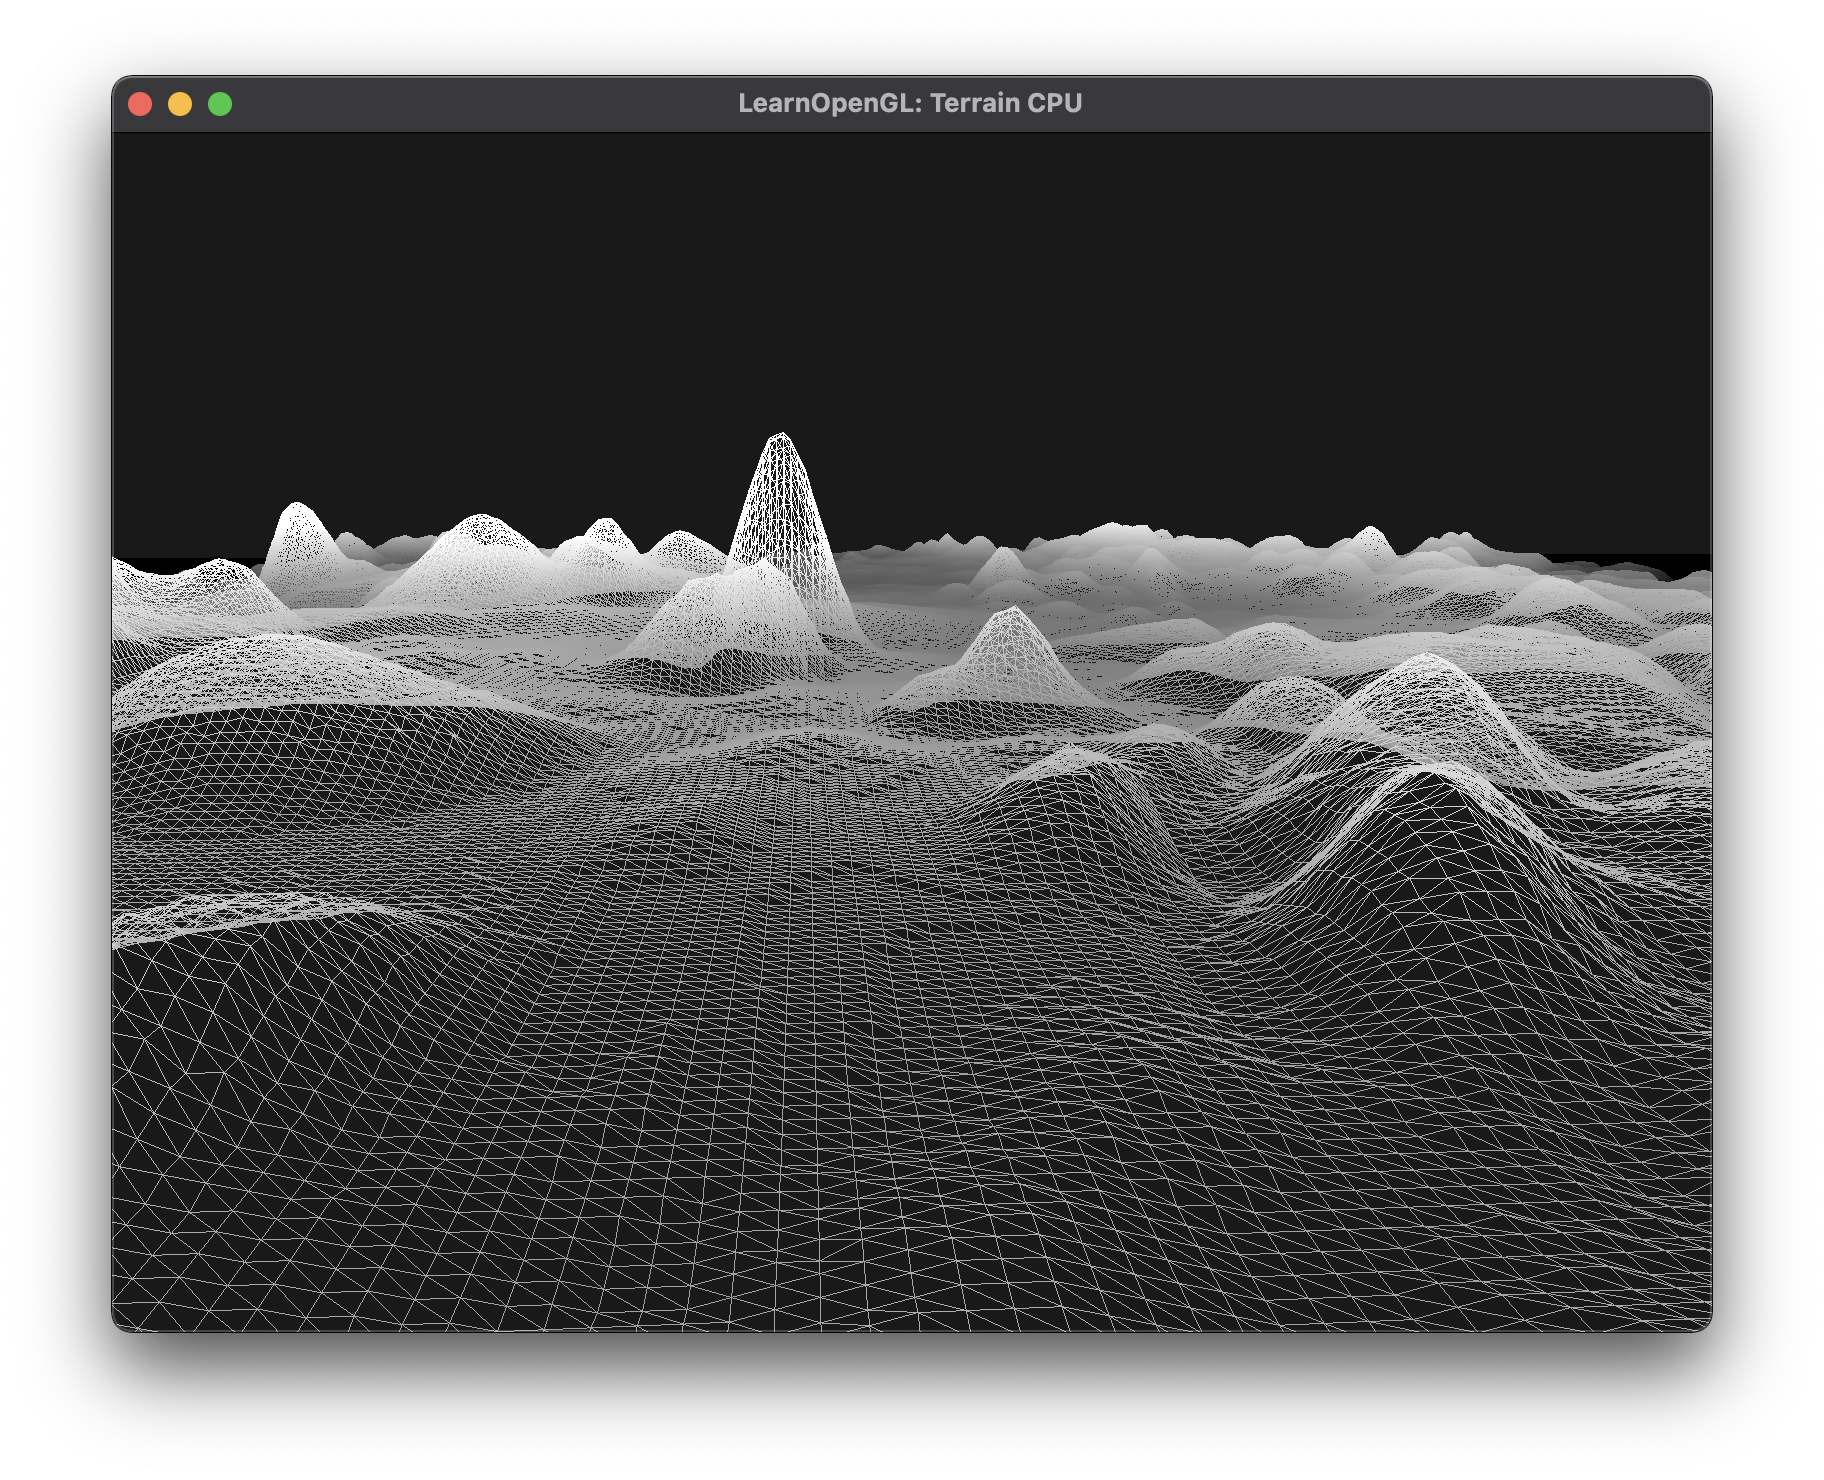
- 아래는 와이어 프레임
- 아래는 개인 프로젝트에서 이를 구현한 것으로, 추가사항은 다음과 같다.
- 정점 애니메이션: 정점 버퍼 데이터를 GL_DYNAMIC_DRAW 로 할당, glBufferSubData로 매 프레임 마다 보간한 값으로 교체
- 텍스처 애니메이션: 두 개의 texture 사용 및 보간
- 텍스처 uv: (i/width, i/height) 값으로 버퍼 생성
